Saturday, November 9, 2013

"Doggy Themed Treats for Humans" Gift Basket

Much has happened since this blog was last updated. I've been offered a new job based out of Austin, TX, and Robert and I are headed west in a few short weeks. So, my attention has been elsewhere. (Wrapping up current job, lots of travel for current wrapping up job, getting ready to start new job, putting house on the market, deep cleaning house, maintaining house in show condition, keeping two pets out of the way of showing house, apartment hunting in Austin, you get the idea.)

Part of the bittersweet process is saying goodbye to 10 years of friends, places, and neighbors. Robert and I are both taking 2 weeks off between jobs to do just that. And here comes the purpose for this post. 


For about as long as we've had Bruce in our lives, we've had the Bark Station


They love Bruce as much as we do, and for that we love them, too! They are one of the things we will miss the most, and so I wanted to put together a little thank you gift and include all of their employees. So, I created this super cute and affordable Gift Basket.


I wanted to make sure everybody got something, so this gift basket is a grab bag of sorts.

Here's what I did:
1. Find cute dog themed items. Snoopy, Scooby-Doo, Pluto, and Jingle, the Hallmark ornament are easy finds. I shopped Target and the Dollar Store, and each gift was between $1 and $7.99. 
2. At first, I searched for the traditional gift basket, but I just couldn't find what I was looking for. Then it hit me! A large dog dish was just the right sized container, perfectly themed, and priced right at the dollar store!
3. I also purchased the paper confetti and the plastic gift bag at the dollar store. I had the paper and ribbon at home.
4. Cut out the tag from cute paper. (You could find a bone pattern to trace, but I just free-handed it.)


5. The tag says "doggy themed treats for humans."


6. Assemble your gift inside the bag. The sticker sheet is tucked into the back of the bowl and helps to support the other gifts and hold up the bag.
7. Tie the gift bag and add the tag. Voila!

Total cost: $26.89, but I splurged on a few items. You could certainly make this with items only from the dollar store and it would cost about $15.

Here's a list of everything inside:
Dog Bowl
Doggy themed stained glass project
Dog sticker sheet
Target gift card with spot pez dispenser (I made the gift card for $5)
Blank note cards with dogs on the front
Snuggle Puppy, a cardboard children's book
Jingle, Hallmark puppy ornament
Pluto pen (got this at Disney World awhile back just waiting for this occasion to gift it)
Scooby-Doo magic towel
Scooby-Doo Mystery Scented hand soap
Dog Ornaments
Snoopy travel tissues
Scooby-Doo themed popping candy (individual packs just sprinkled in the bag like confetti)

Hope this inspires you to get creative with your gift baskets! What dog lover in your life would love a gift like this?

Friday, September 13, 2013

Quick & Easies: Super Soba Salad

Hello there! It's been so long, I hardly recognize you!

First, a quick garden update:

The first two seasons of square foot gardening have been a successful and educational adventure! I will post the full journey and lessons learned soon, but here are the highlights.

The garden produced an abundance of collards, kale, basil, and beets; all mine for the cooking! The okra, bell peppers, habenero, jalapeno, and eggplant are still going strong, but I've planted the fall garden in the empty spaces - more beets, carrots, collards, and kale (these are cool weather crops, good for early spring and fall), as well as spinach, daikon courtesy of my generous friend Amy, and my almost ready to harvest black eyed peas. I hope the collards catch up, because I can't have one without the other!

Some Summer highlights:

Kale - I've planted more in the Fall garden - it tastes even better when exposed to frost! It's used in the delicious recipe below, so I know I'll be using plenty of it!

I didn't get many Heirloom tomatoes, but every one was more delicious than the last and worth every ounce of patience. I have one left and debating on whether to let it ripen, or fry it still green. 

Habeneros are notoriously hot, and these puppies are much hotter than what you get in the store. I guess that long truck ride zaps some of the spice. I've got more of these than I know what to do with - 20 so far and counting!


One of my favorites, these okra are going to become gumbo soon enough!


Now, on to the Super Soba Salad! Nine easy ingredients, and with a little boiling water and whisking, in 15 minutes or less you've got a salad worth of a main course!

Chopsticks optional.

Let's make it!

Ingredients: This recipes makes a a salad for two, double the recipe for 
Dressing:
1 T honey
2 T rice vinegar
2 t low sodium soy sauce (or the regular stuff, or tamari, or Braggs, or... you get the idea!)


Salad:
2 bundles of Soba Noodles (These typically come preportioned 4 gently wrapped bundles to a bag. I use one bundle per serving.)
1 cu thinly shredded kale
1 cu thinly shredded red cabbage
1/2 cu shredded carrot (about 1 carrot worth)
1 scallion, sliced into thin rings
1 T toasted sesame seeds


Soba Note: Soba noodles are easy to find these days in the Asian section of just about any grocery store. I buy the organic ones from Whole Foods. Fiber rich, these noodles made from buckwheat are an excellent choice to satisfy that carb craving.

5 Quick & Easy Steps:
1. Boil water and cook the soba noodles. Most recipes tell you to "follow the package directions," but I've always found that the directions tell you to cook it for way too long. These noodles just need a good stir and then 2 or 3 minutes in the water and that's it! Drain and rinse under cold water.
2. Whisk together the 2 T rice vinegar, 2 T soy sauce, and 1 T honey in a large bowl. Add the kale, cabbage, carrots and toss with tongs.
3. Add the soba noodles to the cabbage dressing mix and toss to combine.
4. Top with sesame seeds and scallions.
5. Enjoy!

Note: Although modified, I must confess that I gained inspiration from a Whole Foods recipe in the store. And I am so glad I did!

Saturday, May 11, 2013

Vegan Black Bean Quinoa Burgers

What's better: the scent of freshly mowed grass, or the way the air smells after it rains? I've got both going on right now, and it's lovely.

Check out the garden! We're about 12 weeks in from seed and she's looking great:


Ok, so the eggplant and the celery from seed didn't take, but I bought some organic eggplant and bell pepper plants and they are mighty happy. I also bought Robert three habanero plants that were on sale for $8 total! Pictured here in the white tub:


Say hello to snap peas! 


Can you see them?

On to the recipe! 

I know I've already blogged about Black Bean Burgers here. And they are delicious! But quinoa takes this recipe to a whole new level of texture perfection. Admittedly, I have not been on the quinoa bandwagon. I bought a box, tried it once, and then these ancient grains earned their title by hanging out in my pantry for over a year. But as I was whipping up black bean burger experiment # 103 and digging through the pantry, I decided to forgo the usual breadcrumb filler (after all you are enjoying it between two buns) and use up the quinoa. And pure awesomeness ensued.


Ingredients:
This recipe makes about 12 - 1/4 lb burgers

3 cups of cooked black beans (I made mine from dried, but you can use 2 - 15 oz can of black beans, drained and rinsed)

1/2 cu quinoa (I used red, but any kind will do)
1 cu water

1 T olive oil
1/2 bell pepper
1/2 onion
2 carrots
5 or so mushrooms
3 green onions (You can choose veggies you like or veggies you'd like to use up. This is what I had on hand.)
S and P

1/4 cu vital wheat gluten
1/4 cu corn meal
1/8 cu nutritional yeast
1 T ketchup
1 T mustard

Here we go:

1. Preheat oven to 400° F.. In a small pot, toast the quinoa over medium high heat for 1 - 2 minutes, stirring occasionally. Quiona will have a nutty aroma, but don't burn it! Add 1 cu water and bring to a boil. Lower heat, cover, and let cook for 15 minutes. 

2. Heat 1 T over medium high heat in a nonstick skillet. Dice bell pepper, onion, carrots, and mushrooms and cook for 5 - 7 minutes. Season with S&P to taste and add diced green onions.

3. Add cooked quinoa and veggies to food processor. Pulse a few times, then add cooked black beans, 1/4 cu vital wheat gluten, 1/4 cu corn meal, 1/8 cu nutritional yeast, 1 T ketchup, and 1 T mustard. Pulse until well integrated, but some black beans are still whole.

4. Form into 1/4 lb patties. You could go bigger, but the texture is better on a smaller patty because it cooks through in the oven. Place patties on a baking sheet lined with a silicone mat and bake for 30 minutes, flipping burgers over after 15 minutes. Check patties for firmness and cook longer if need be. You could cook these on the grill as well, but I would precook in the oven to firm up first. They reheat perfectly in the toaster oven while you are toasting the buns!

5. If you'd like, serve these burgers with these amazing whole wheat buns and a side dish of corn hash. Yummy!

Why, yes, that is lettuce from the garden!

Robert had his burger with sauteed jalapenos and BBQ sauce, mine was a classic pickles, lettuce, tomato, and ketchup. But with such a delicious foundation as the black bean quinoa burger, the sky is the limit. Heck, you could form these into meatless meatballs instead of paddies, or fill a loaf pan for some veggie loaf!

Also, they freeze wonderfully, but one taste and you might not be able to save some for later! 

Enjoy!

Saturday, May 4, 2013

Top 5 Secrets of a Super Packer

After years of travel for work, packing has become second nature to me. I rarely bring more than a carry on, no matter how many days of travel lie ahead of me. But I recently had one of my more extreme trips: three weeks straight! I am proud to say I did so with only two suitcases and didn't even use the extenders. In fact, I had to pack my projector, snacks, and some other work essentials along with the clothes; take those items out and I could've done it in one!

You may be traveling for leisure, but I am certain you can use these 5 packing tips to your advantage. And you won't even need to make room for all of the suit jackets and shoes. :)

Tip # 1: Organize
Yes, yes, the simple secret to success will always be organization. But here's how I do it. About a week before my departure date, I clear a space in my closet. Then I hang up everything I might want to wear, which is usually way more than I need to pack. I narrow down the outfits based on how many days I am traveling, how many cities I am hitting (more cities means more repeatable outfits since I will be around a new audience).


I also narrow down the outfits based on how many pairs of shoes I am bringing. I make sure that each pair goes with at least two outfits. My shoes are multitaskers! Eight in this instance, including a pair of running shoes and a pair of Toms. Comfort after long hours at work is crucial and I love that these shoes lay flat in my briefcase so that I can slip them on as soon as I "clock out." And yes, I brought two pairs of pink heels, but it was a necessity!


As you can see, I pack mostly dresses. They rarely need additional ironing and they take up much less space than pants or suits. I hang complete outfits on each hanger and arrange the outfits in the order that I will wear them. This will be important in Tip # 4!


Tip # 2: Accessorize
So this is an organizational tip as well, but it keeps your necklaces from getting tangled and it keeps you from forgetting the finishing touches of a great outfit when you travel. I place the accessories for each outfit in a sandwich baggie on the hanger. I also separate my intimates into these baggies, which not only saves space but makes sure I have just the right item to wear with each outfit. (You know you've been stuck in that final day of a trip wearing that last pair of granny panties with those skinny jeans. Never again!)


Tip # 3: Travel Day
Plan to wear your bulkiest outfit. For me, this meant my orange blazer and my pair of jeans. It's smart to wear layers on the airplane, too, because they never can figure out that thermostat - it's either burning up or freezing cold.

Tip # 4: Packing Smart

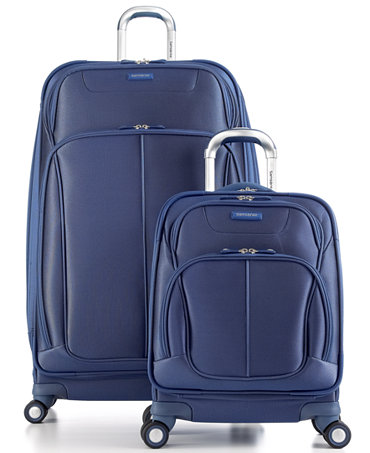
I use two suitcases - one for clothes and shoes; one for beauty. My suitcases are first gen Samsonite spinners. Here is a more updated version currently available at department stores:

Start with your shoes. I like to fit as many as I can into the zipper compartment of my larger bag.

Next, gather about 1/2 (up to 8 outfits) of your clothes still on the hangers and gently fold them into the suitcase:


Then, gather and fold the remaining outfits on hangers and fold the other way, so there is an equal number of hangers at the top and bottom of the suitcase. Large suitcase: check!

What is great about this technique is that when you arrive to your destination, unpacking is a snap. Just pull out and hang! Hardly a wrinkle and already in the order you are going to wear them!

The smaller carry on sized suit case I use for any non hanger clothes like socks and pajamas (I bring two pairs and shower before I get in my jammies, so they stay clean), beauty accessories, and the aforementioned work necessities like snacks and my projector. Which brings me to...

Tip # 5: Beauty Smarts
Although I travel enough to be precheck (a special airport security line where among other perks, you do not have to remove liquids from your bag), I try to travel with as few liquids as possible. No accidental spillage! Here are my top 5 travel necessities from Lush:

Eau Roma Water: The one liquid I would not mind spilling in my bag! It's a spritz toner and a great travel accessory.  It smells like lavender which helps to soothe and hydrate road warrior skin.

Strawberry Feels Forever: This massage bar is the perfect liquidless lotion.

Coconut Deodorant Powder: This stuff is brilliant! In addition to its main purpose, I also sprinkle it in my shoes, use it as undereye powder to set my makeup, and as dry shampoo in a pinch!

Orange Blossom: Solid perfume goes wherever I do to keep me smelling yummy.

Godiva: I saved the best for last. This miracle bar is everything I need in the tub. Shampoo and conditioner in one, it also acts as a body wash and shaving cream! And the jasmine smell is to die for!

 Bonus: This is post trip, but I've recently started using their toothy tabs, and I am hooked! An alternative to toothpaste, your teeth will never felt cleaner save a trip to the dentist, and the container is recyclable or compost-able! A much better alternative to the tube!

Well, there you have it! Five great tips to help you pack smarter! Now, go buy that ticket to paradise! Happy travels!


Thursday, May 2, 2013

The Best Homemade Pizza


The goal: to create a 100% whole wheat pizza crust that tastes yummy. I have now spent years perfecting this recipe and this is the version I keep going back to. It's simple, delicious, and yeah, I think you can call it healthy for pizza. Here it is:

Ingredients:
1 cu warm water (around 110° F)
1 package (2 & 1/4 t) yeast
1 T honey (you could use 1 T sugar, agave, or maple syrup instead, but don't use fake sugar - the yeast need food to make bubbles)

2 cu whole wheat flour (plus more for kneading)
1 T olive oil
1 t salt

Variations:
If you want to make a thinner crust add 1 t apple cider vinegar
You could also add seasonings to the crust, such as oregano, crushed red pepper, sun dried tomatoes, sub spinach or kale juice for the water, you get the idea!

This recipe makes 2 thick or 4 thin crusts. Sometimes I'll make 2 flatbread pizzas and freeze the other two for a quick meal another day.

Instructions:
Combine the 1 cu warm water with the 1 T honey and 1 package yeast. (I mix this up right in my glass measuring cup.) Let sit for 10 minutes.

Meanwhile, in a large bowl, combine 2 cu WW flour, 1 T olive oil, and 1 t salt. Include your variations here too if you are using them.

When 10 minutes is up, combine the yeast mixture into the flour  mixture and stir until just combined (you may need to use your hands). Lightly dust your countertop with flour and knead for a few minutes. Form dough into a ball and return to the large bowl. Cover with a towel (or the lid of a pan like I do) and let rest for at least 30 minutes.

Preheat oven to 400° F.

When 30 minutes is up, divide dough into 2 or 4 smaller balls (depending if you want thin or thick crust). On a floured surface, roll into desired pizza crust shape and place on baking sheet. Dock with fork, and blind bake crust for 10 minutes. Remove from oven, top with desired sauce and toppings, and bake for an additional 7 to 10 minutes. Let cool, cut, enjoy!

Bonus! Here is my super simple sauce recipe:

Ingredients:
1 - 28 oz can San Marzano tomatoes
Any seasonings you like. I use:
crushed red pepper
oregano
Instructions:
Combine ingredients in a blender. Boom.

Enjoy.

Saturday, April 20, 2013

The Garden & Bonus! Ginger Dressing Recipe

I just traveled for work for three weeks straight. I missed Robert the most of course, and the puppy and kitty second most. I mean, how could you not miss this face:

But the thing I missed third most was my garden. I had just started to plant seeds before I left and couldn't wait to see what awaited me upon my return. In fact, I had Robert text me pictures of the garden while I was away!

Here's the garden before and after my trip. On the left, you can just start to see the snap peas and the collards peeking out from the soil. On the right, sha-zam! The red leaf lettuce had grown enough to make a huge ginger salad. I just took the outer leaves, so the little guys will continue to grow. Ginger Dressing recipe below!


Here's what we planted. Each box is a square foot and the number is how many of each plant is in each box.

As you can see, we followed Mel's techniques to a T, with awesome results so far! I highly recommend downloading his book:


Squarefoot gardening saves space, seeds, and water. And money in the long run. It was about a $200 investment for the supplies and soil, but once you're set up, you only have to add a scoop of compost to each square before growing again! No need to replace the soil! Plus, you only plant what you need (I mean who could use every head of kale 1 packet produces maturing at the same time?) so you can plant from 1 packet season after season.

Here are the basics:

1. Create your raised bed and line it with a drain-able weed barrier sheet. This is a no native soil technique.

2. Make your Mel's mix of 1/3 vermiculite, 1/3 peat moss, 1/3 compost (comprised of a few different types. I used chicken, mushroom, cow, and earthworm). This mix is costly, but again you never have to replace it! And it holds water well, so you use about 10% of a normal garden's watering needs. 

3. Add the mix in layer by layer, spraying down with a hose between each layer. Once filled, just top with the wooden slats spaced 1 foot apart. I used wooden siding that I had Home Depot cut into 4 ft slats for me. Then I drilled a hole at 1 ft increments and put a nail where the holes intersect.

Again, I highly recommend the book, as it will go into some detail that I didn't, but I can attest to how much I love it so far! Next year, the entire backyard may be square foot gardens! 

Oh yeah, I'm also growing a few things that don't quite fit the square foot rules. The black barrels on the right are potatoes and sweet potatoes, and the herbs (from left to right) are oregano, sage (which is going crazy!), and rosemary. These herbs have been with me for three years now and just keep getting better and better! I love being able to walk outside to snip some flavors for tonight's dinner. In fact, I just added a few rosemary sprigs to the garbanzos in my pressure cooker.


Bonus! Ginger Dressing Recipe:
This is a classic recipe with a Kelly twist.

1/4 cu each peanut oil and rice vinegar
2 T each grated onion, celery, fresh ginger root (no need to peel, the grating will do the work for you!)
2 T each ketchup, soy sauce, lemon juice (We always use organic ketchup to avoid the HFCS)
1 T sugar
1 t garlic
salt & black pepper

Puree in blender about 30 seconds until smooth consistency. Enjoy with greens of your choice and the classic accompaniments of tomato, cucumber, and carrot.

Happy Growing!

Saturday, February 23, 2013

Quick & Easies: Vegan Choco-Banana-Nut Muffins

You probably have three overripe bananas sitting on your counter right now. What are you waiting for?


I set out to make this recipe as quickly as possible with as few ingredients and dirty dishes as possible but with as much yumminess as possible. Here are the results.


Makes about 12 muffins.
Ingredients:
2 T flax
6 T water

3 overripe bananas
1/2 cu sugar

2 T canola or veg oil
1 T vanilla (I use homemade vanilla extract and I love the flavor. If your vanilla is store bought  you may only want to use 1 teaspoon)
1.5 cu whole wheat flour
1 t baking soda

1/2 cu chocolate chips
1/2 cu chopped walnuts

Very Easy Directions:
1. Preheat oven to 350° F Whisk 2 T flax and 6 T water in a small bowl with a fork. In a large bowl, add bananas.


2. Add 1/2 cu sugar to bananas and mash with fork. 


3. Add flax mixture, 1 T vanilla, 2 Toil, 1 t baking soda and mix. Slowly incorporate 1.5 cu whole wheat flour and fold in with spatula. Add 1/2 cu chopped walnuts and 1/2 cu chocolate chips and give a final stir.


4. Filled lined baking cups and bake at 350° F for 25 - 30 minutes until a toothpick inserted in the middle comes out clean.


Enjoy!